header-photo

It was Fancy Friday When I started this...

Welcome to another Fancy Friday. Normally at this time of the week, Mike and I would be gearing up for a rough and tumble weekend of work around the house.

But not this weekend.

Shocked? Well, I'll tell you what's going on. We finished the chimney last weekend. I raked leaves. Our carpenter extrodinaire TJ put in our new kitchen window. It was fairly productive.

But in light of the upcoming holiday and fast growing Home Depot credit card balance, Mike and I are taking a well deserved and neccessary break from home repair in order to catch up on our other other hobby - vehicles!!!

You see, last year round holiday time, Mike's '96 Tacoma ran into problems. Rather then fix it, we just stuffed it into the garage and bought a full size Dodge. (Cause you know we have the slide-in camper and the trailer and all - plus having a Dodge diesel is pretty fuel efficient for a full size truck - anyway - this is a tangent.)

So.... in order to pay off debt and have some money for the holidays and hopefully some for my beloved '78 trans am, which was so ruthlessly kicked out of the garage when the truck went in. (She needs two new doors, both inner fenders, a full weatherstrip kit, and one fender, plus motor mounts and a crud load of small niceities. Tangent 2. On a roll.... with cheese.) For these reasons and more, we need to fix the Toyota.

With a four day Thanksgiving weekend on the horizon, timing couldn't be any more perfect. So, we'll be spending our vaca in the garage. And hopefully, by monday, the truck will be for sale on our front lawn.

Ever so Toasty, There's Nothing Like Heat

So over last friday and saturday, as I prepared for our annual post-halloween bash, mike set himself to the psychotic task of making the heat work. 

The chimney is not totally finished, but it was high enough to be considered safe. So Mike installed two new baseboards upstairs for the second zone and finished plumbing in the basement.

Upon first pressurizing the system, everything seemed okay - no leaks. Then, just a few hours before the party, as Mike fired up the furnace for the first time, a few leaks appeared in the basement. We had to call over our plumber friend Brian to bail us out, for which I am ever so grateful.

We got it working and the party was a success.

However, now we're having some detail issues. The thermostat seems to be hooked up backwards - the heat is hooked in to the AC. Which means, the thermostat thinks that the heat is air conditioning.... a slight problem.

Plus - we don't have the second zone thermostat hooked up yet, so the upstairs keeps getting super hot. Hopefully we'll be able to get these problems resolved soon and then take a breather for the holidays. 

My home depot account needs to recover a little!!!

Hi, I'm Jess. And This is My Job

Last night the foundation we poured for the chimney had hardended, so we set ourselves to the second step - drilling a 6" hole in the basement wall where the pipe from the furnace will intersect the chimney.

After that was done, we had to drill matching holes in both the cement flue surround and the flue itself - a task that we thought was going to be so much easier than drilling the basement wall....

And drilling the cement flue surround was. Mike took care of it in less than 5min. But when we got to the flue - a terra cotta-like clay flue - all I could think about was Dirty Jobs' Mike Rowe and the episode where he's smashing huge terra cotta pipes quite easily with a sledgehammer. Terra cotta is not tough.

And sure enough, we tried drilling it, chipping it, grinding it - but every time, the flue piece just cracked and broke.

After some research, we found out that only a diamond tipped tool will cut it without breakage. Unfortunately, we don't have one. But a way around it is to build a brick base for the flue and allow the furnace pipe to enter through the bricks. 

Hopefully we'll be able to do that tonight. We're already a few days behind on this whole chimney project and cold weather is fast moving in for this weekend....

Another Option

So after being all gung-ho for ISOKERN, thinking this was the most economical thing ever, I was shocked when Mike came home with a similar setup at a cost of under $300 for an entire chimney on Saturday.

He just went down to our local concrete company, asked them for a pre-fab modular chimney setup - and they had it! This one has separate flue and concrete surround peices. You just put on a peice of flue, slide a concrete square on top of it, put mortar on both, and stack another flue on top of the flue and another concrete square on top of the first concrete square. And after twenty feet of repetitions, you've got yourself a chimney. Plus, you can purchase all sorts of fassads (Wrong spelling, I know.) that just stick on the outside with mortar. Various kinds of brick, stone, stucco - you name it. (Those Mike didn't purchase, we'll do that after the fact.)

So.. we're saving about $1,100 with this system vs. ISOKERN. Amazing huh? Pictures to come.

Rock yo Widget Post Test one two

Guess what guys! I'm posting from a DashBoard widget! Isn't this the greatest thing since cell phone pic postings?

ISOKERN

Housebloggers: Has anyone used ISOKERN pre-fabricated fireplaces and/or modular chimney systems before? And if so, how did you like 'em? Did you put them together yourselves? How easy was it? Mike and I had a modular type chimney system to vent our furnace previously - and we thought it was a nifty and likely cost effective, so I googled it.

ISOKERN came up as one of the only companies to make these pre-fab and modular fireplace & chimney kits. (www.isokern.net) Plus, they have an office in Auburn - which is relatively close to us. I printed out a brochure with all the types and measurement specifications, plus a sample of their installation instructions.

Now, theoretically, you're not supposed to f around and install these yourselves. But technically, Mike and I were probably not supposed to install our own heating, electrical, windows, etc. And we definately weren't supposed to rebuild our own second floor and redesign the layout of half the house. I think with the help and support of our many friends in the trades, plus our intimate knowledge in a variety of fields - we can do it.

Ok - so I ringaglinged ISOKERN this morn and told them I wanted pricing on a DM 44 appliance modular chimney for the furnace, standard 36" fireplace, DM 54 fireplace chimney, and of course, another DM 44 chimney for the wood stove.

The DM 44 is $54/ft
The fireplace is $1275
The DM 54 is $65/ft
Plus, we'd need their mortar - one big 'ol size at $60 per project

They don't really have a showroom, but they can deliver the goods within 1 to 2 days, depending on when you get your order in. (Major credit card required, of course.)

So - now we need to do some measurin' & calculatiing to figure out how many modular sections of DM 44 we need. We need this stuff like, toot sweet. I'm freezing my bum off and not feeling too good about it. I'm sick - seriously - I hope Mike doesn't need me to work on stuff tonight. *yaaawwn*

I DID IT!

Laundry. The final frontier. Well... maybe not the final final frontier. Anyway, as you may have guessed, we got it hooked up! And let me be the first to say, woo hoo. I did two loads just last night! Very cool.

But, speaking of cool - we still don't have our heat 'n hot water hookyed up yet. The problem is venting - triple wall metal pipe is expensive. Chimneys are expensive. Professional help is expensive. Most of our pipes are still in place from the old system... so that's not the issue.

Mike's been talking to one of our plumber friends - getting his advice. I think we've decided on a do-it-myself modular chimney system. Truth be told - 30 feet of metal pipe on the back of your house is just fugly. And going chimney is really not that much more expensive when all's said and done, plus it looks better. We just have to head down to our local supply place and see what they have to choose from.

We'll still need some pipage to go from furnace to chimney - but we do have some that was gifted to us by a chimney sweep friend of ours. So that'll save a few hundred dollars.

If the chimney system is economical enough, we'll also purchase enough for a second chimney - for our wood stove. I'm tempted by the idea of a pre-formed fireplace. That would just rock out loud, but needs furthur investigation.

We plan to start on all this tomorrow. The first step will be to wrip off the old siding on the back of the house where chimney #1 will be and replace it with shingles. (Cause who wants to do that when the chimney is on?) Step two is to go down to the supply place and check out the goods. Step three... well, let's just see if we can get step one and two out of the way first.

Yes, I know that's not healthy.

On Saturday our awesome carpenter TJ had a cancellation, so he came to our house to give us back the mudroom.

You see, the story of the mudroom is a tale as old as, say, the wireless web. Or footless leggings. Once upon a time before we owned the house, there was a concrete patio off the kitchen. Circa 1930's. Well, the home's owners decided to make this patio into a room! (Circa, perhaps 1970's.) Normal people might think to hire a contrator. Do it yourselfers might attempt to build it themselves. But this depression era couple decided to save themselves a lot of time, money, and effort by simply attaching a pre-built shed to the house.

Yes, they just took a shed, plopped it onto the concrete, chopped 1/4 of the roof off so it would line up with the rest of the rooflines, and called it done. We know because of this weird roof line - plus they didn't bother to take the old roof (ie roofing shingles and all that jazz) off of the 1/4 left roof side that is now part of our upstairs attic. (I actually had to do this - imagine me in a dark, small crawl space attic in mid-august 2004, ripping off old roofing. I've never sweat so much in my life.)

Anyway - when it came time to lift the house, our housemover said the concrete slab below the mudroom floor had to be removed - it couldn't be lifted.

So we ripped out the plywood and then jackhammered the concrete until it was far enough gone to be able to lift the mudroom with the rest of the house.

And through these past months, the mudroom has been floorless through the entire procedure. Lift, dig, pour, set, tar, fill. And of course, it's been exposed to the elements.

So TJ came on Saturday to rebuild the floor. Almost right away, he and Mike made a discusting discovery. Moisture had seeped in behind the wainscotting and mold was growing - everywhere! Luckily, the wainscotting was only on the bottom part of the walls, but green and fuzzy drywall is never a healthy site. That's some cancer-causing action right there. They guys immediately removed all the wainscotting but continued building the floor next to mold. Gross.

Mike and I were super busy and lived with the mold until Monday. Couldn't hurt to live with it a couple days, right? Well, on Monday when I walked in, I could smell it. That was it. I grabbed a razor knife and started cutting. Mike gave me a hand and in less than a half hour, all the moldy stuff was in contractor bags and out of the house.

That's some sketchy stuff right there. But boy does it feel good to have the room back. We even moved the washer & drier out of the kitchen! Amazing to have that room sans laundry. No more wash-in kitchen! WooHoo! Hopefully we'll have both machines re-hooked up this weekend.

Window Pains

You know, we still have eight big 'ol basement windows to put in. And with the winter months nearly all up on us, that's a big concern. Without the windows, the pipes could freeze just as quick and easy as they did before we had a basement!

Mike tried cementing one in about a month ago - but plain cement is too juicy and rocky to really work well. It just flowed out the sides and made a big mess. So, naturally, we called a mason. He told us that the kind of windows we have are supposed to be put in before the foundation is poured. *sigh* And they're really hard to put in after the fact. The quote he gave us reflected that - $1200 to $1400.

No way did we want to pay that. That's waaaay too much. So, Mike got creative and fashioned a set of window forms made of 2X4's and plywood and bought some masonry concrete mix.

His plan was ingenious. First, he'd put in the window. Then, he'd tape off the interior border with good duct tape. (Not that junky job lot stuff - actual, for ducts duct tape.) Then he'd put on the exterior form, which covers the entire window hole, and feed through two long, thick screws through pre-drilled holes. Then, he'd put on the interior form, lining up the screws with the pre-drilled holes in the interior form.

And then he'd wrench a nut on each screw until the two forms were as tightly squeezed together as possible. This would prevent the concrete from leaking out all over Z place.

Once all that was in place, he'd mix the mason's concrete and pour it in over top of the forms - on the two sides of the window and on top of the window. He'd smooth the concrete on top of the window to match the level of the foundation. And then, leave it to dry.

With only two forms and a lot of labor involved, we can only do one window per day. Last night we completed the first one - a test. We'll see how good it works when we take off the forms today. But it seemed to work perfectly - the forms held in the concrete, none dripped anywhere inside or outside!

The only concern I have is the bottom of the window. Mike thinks that enough concrete will seep in there to hold it in. I think a layer of concrete should be put on the bottom before the window/forms are put in. Mike's also concerned about the masonry concrete forming a strong bond with the foundation concrete. If the bond isn't strong enough, he may have to rough up the surface of the foundation concrete in the window hole to allow for a better grip.

Tonight we'll see! If all goes well, we'll do another window - and in 7 days, all the windows will be in!

Out on a Trim

FINALLY! We are so lazy sometimes.... well, not that we're lazy. We just happen to start new projects before old projects are really completed. The countertop, the hallway drywall, the trim in the entire house, painting behind the kitchen stove, the second heating zone... god, I could go on forever on half finished projects that were inturrupted halfway through.

But - at least now I can say that the countertop is finished! Yay! Also, we painted our exterior window trim - it would not have survived winter elsewise.

Now if we could just get our heat/hot water hooked up. We got the furnace... now it's just a matter of pipes and vents.

And, there it is.

So - yes, these were taken by my camera phone, so don't hate the fuzzy cruddiness. Here is that section of countertop yet to be finished.


You can see more clearly here, it is in fact, plywood!


And the rest 'o the kitchen looks very nice, don't you think?


Counter Point

If you are shopping countertops - and not expensive custom granite or stone or butcher blocktop - the el cheapo laminate from your local massive home improvement chain restaurant - which, by the way, I'm not knocking! I get a lot of comments on mine - good ones!

Ok - that was the point, here's the counter point. DO NOT, let me repeat myself for speed readers who may have missed that, DO NOT BUY 90% OF YOUR COUNTERTOP AND THEN WAIT 5 OR 6 MONTHS TO BUY THE REMAINING 10%.

Yes, I admit. This seems like a simple point. But waaay back in the day - and if you go back and look at my posts - there's one about the joy of getting that first 90% of countertop somewheres in there - I was really happy to get that first 90% of countertop. Previously I had just plopped my cutting board across the cabinets - that little 2 ft area was my only space! I nearly cried when the counters went on.

But, we didn't buy enough for the back right corner of the room. So for temp, we just plopped on a peice of plywood and called it a redneck butcher block. Well, money waxed and waned and other big projects needed to take priority as the months went on. You know how it is.

But throughout this 5 or 6 months, a little voice inside my head said "countertop countertop" or "it's only a 4ft section" or "it's only going to be like, $30" over and over.

So last night that little voice got big as Mike and I pulled into home depot for more grass seed and fertilizer. But when we got to the kitchen section - there were NO small sections of that color. Mystic Night or something like that. In fact, there was only one Mystic Night left - a super long 10ft peice.

Immediately I thought to myself - what if it's discontinued. Mike thought the same thing, so we grabbed the sku off the thing and went to customer service to find out what the deal was. Well, turns out that the sku wasn't coming up in the computer - it might be discontinued! So the clerk checked some other Home depots, made some phone calls. No luck on a small peice.

I finally said, "You know what, for the price it would take me in gas to drive all the way to east bumbledom (not a MA town by the way, but it should be) looking for a 4ft section, I could just buy the 10ft here."

And so, we did. Which isn't horrible, because we'll have some extra if need for it ever arises. But I spent $70 more than I needed to, which is annoying to say the least.

So, the lesson here is - a countertop in the hand is worth 2 in East Bumbledom. And at least five in Center Bumbledomport. Don't wait. Buy it all at the same time.

And if anyone else has this pattern and needs about 6ft worth... well - let me know.

2006 = Muy Bien

I am so bored. Nada to do. Dead. Everyone else at my work is going plum crazy. But unfortunately, I did my part and now I'm bored. I wish I could help with the graphics/web stuff. But I'm so inept.

I was looking through this blog throughout the months of 2006 yesterday. Hard to believe what a year it's been. Mike and I started out the year with a hope of finally lifting our home to put in a basement. January through April was nothing but permit apps, futile calls to contractors, and conservation commission woes.

The lift finally began in April and we moved out to Mike's parents house. By June, the house was down on its new foundation and by July 4th - we were moved back in.

In August I hatched the plan for a backyard wedding September 9th and we worked feverously to make it happen. In the same month, we also refinanced the mortgage and equity loan. On 9/9, everything went off without a hitch.

So here we are, 3/4 through the year and still going strong. I am going to make some goals here. With all 'yalls as witnesses.

Goal #1 : Hook up the following: Hot water tank/furnace/heating system/2nd heating zone. (That all counts as one.)
Goal #2: Bathroom Bathroom Bathroom

I think that'll keep me busy through Jan.

So what? Sew seeds!

I picked up a bag 'o seed and a bag 'o fertilizer at BJ's last night. I figured - eh, what the heck. Cheap enough. Of course, then Mike and I had to go to the Deep-Ho to pick up a push spreader and a rake... jacking up the price a little bit. Oh well. It's still a last ditch effort cheaper then hydro seed or sod.

Today's the last hot hot day this week, so we may plant tonight. Tomorrow's supposed to rain, which would be good because then we don't have to water so much.

Mike: The Next Generation

Mike has been the nicest person ever since we got married. Maybe it's the release of all the stress. Maybe it's newlywedism. In any case, I like it. Just this weekend Mike helped me install the soap dispenser I've been wanting to install since August, 2005. Then he changed my oil.

And - Sunday morning I happend to mention that he should call our carpenter to come over and install our new stair steps. I go out to do a few errands - and when I come back, he's tearing up the old stairsteps to put in the new ones! When I walked in and said "What are you doing?!" he merely answered, "You said you wanted it done."

Well I just thought that was the awesomest thing ever. We installed the new treads and they look pretty good. We still have to trim them out and everything - but it's already a lot better then those old treads with the nails sticking out of them. Can't tell you how many times I nearly punch a hole in my foot.

This same weekend I also installed three new eyeball trims in the upstairs office recessed lighting fixtures. Looks a heck of a lot better I tell 'ya. That was my mini-project along with the normal cleaning.

Ooo! Ooo! Also due in early this week is our new furnace. I can't wait. Once we have that in hand, we'll head to the Deep-Ho and get a hot water tank. A nice biiiig one. (Because I've lived with short showers and no baths for waaaay too long.)

Also, we're going to try and get some seed/fertilizer for the front yard. Just some el cheapo bags. Couldn't hurt, and we decided not to spend big bucks on a lawn right now. Who knows. Maybe we'll grow some grass or something. Isn't that a novel idea?

Aunt Sharon Makes a Startling Discovery!

The question all girls want to know...

A little OT here - but does ANYONE know that song? It's an oldie and it goes "the question all girls want to know... is there enough room to make love in a spaceship..." That's all I know of it and my friend Becci and I have been trying to track it down for YEARS.

Anyhoo - the real question all yous out there probably have been asking - now that the basement is done and the wedding is over - What's next on the house to-do list?

Well! I've been screaming BATHROOM! BATHROOM! Which, has led Mike to think I have some sort of disorder. But seriously, he reminded me that we have yet to put in the basement windows and finish getting our new oil tank hooked up to a not-bought-yet new furnace and hot water tank. We've got to get our good friend and heating man Hal on that ASAP. (Hourihan Oil - best oil there is, look 'em up if you're in the south-eastern MA area.)

And I have to admit - what is a beautiful bathroom without enough hot water for a nice soak in a jacuzzi tub? Or a long long shower after a cold and unloving day?

So, hopefully, we can get on those windows this weekend. Because next weekend we'll be up in NH for some R&R. Not a honeymoon, but it will be fun to get away.

We Did It!


There was always something... wait til I got out of school, wait until I had a better job, wait until he had a better job, wait until we had a house, wait until the house was done... Well, after graduating, switching jobs, Mike switching jobs, buying a house, renovating a house (partially) - We were sick of, well, waiting.

So last Saturday 9/9 we were married. The ceremony was held just down the street from our house and the reception was in the yard. And despite the lack of grass, everything was perfect.

Flowers and Mike

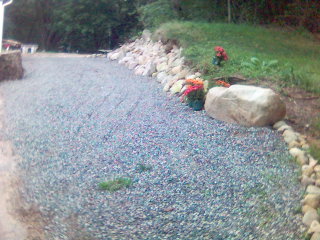
Mike graciously models the mums on the rock wall, which I have yet to plant.

Promised Pics

Amazing what one little hanging plant can do to the overall look of a doorway.


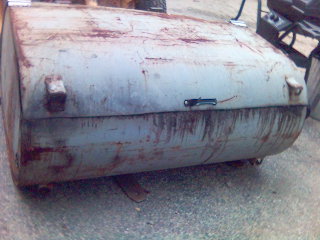
Trogdor - the Oil Burninator. They eyes were originally the feet of the oil tank.


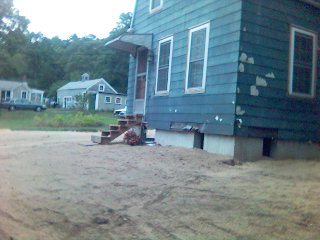
The front yard - graded and grassless. September is supposedly the best time to plant grass. I hope I can hydroseed soon.


The rock wall - yes, you're not supposed to do it that way, but it looks nice, don't it?